It’s almost unavoidable: your Mac will likely slow down after much use. This is a problem all computers face with enough time, but you don’t have to buy a new one every time it happens or even reset to factory settings. There are plenty of ways to speed up your slow Mac without spending a cent. We have listed ten free ways for you to try. Keep reading!
Table of contents
- Why is my Mac so slow?
- 1. Close applications you aren’t using
- 2. Delete apps you don’t need
- 3. Check the activity monitor to know what’s slowing you down
- 4. Disable unnecessary startup apps
- 5. Clear cache from browsers
- 6. Optimize disk space usage
- 7. Install macOS system updates
- 8. Delete projects and files within applications
- 9. Use a RAM monitor or cleaner
- 10. Reduce visual effects
- 11. Clear system cache
- 12. Manage browser extensions
- 13. Beware of outdated apps
- 14. Check your internet speed
- 15. Know if your Mac is overheating
- 16. Check for malware
- 17. Upgrade your RAM or switch to an SSD
- 18. Restart your Mac
- 19. Maintenance to speed up your slow Mac
- 20. Your Mac is simply too old
- Final thoughts
Why is my Mac so slow?
If your Mac is running slow, there could be several underlying causes. Here are some common reasons why this might be happening:
- Lack of storage space: One of the most frequent causes of a slow Mac is a nearly full hard drive or SSD. When storage space is low, your Mac struggles to find room for temporary files and essential system operations, leading to sluggish performance. Regularly clearing out unnecessary files, moving large files to external storage, or using macOS’s built-in storage management tools can help alleviate this issue.
- Too many startup items: If your Mac has too many applications set to launch at startup, it can significantly slow down boot times and overall performance. Reviewing and disabling unnecessary startup items in your System Preferences can speed up your Mac considerably.
- Outdated software: Running outdated versions of macOS or applications can lead to inefficiencies and slower performance. Updating your software ensures that you benefit from the latest optimizations, bug fixes, and security enhancements.
- Background processes and open applications: Having multiple applications open simultaneously or running resource-heavy processes in the background can strain your Mac’s CPU and memory, slowing down your system. Using the Activity Monitor to identify and close these processes can free up resources and improve performance.
- Malware or virus infections: Although less common on Macs, malware can still affect performance. Running a reputable malware scan can help identify and remove any malicious software that might be slowing down your system.
- Hardware issues: In some cases, hardware problems such as failing drives or insufficient RAM might be the culprit. Upgrading to an SSD or adding more RAM can significantly improve your Mac’s speed, especially if you run multiple applications at once.
- Too many browser tabs and extensions. Working with numerous browser tabs and extensions can slow down your system, especially those with dynamic content like video streams or heavy scripts. Having too many extensions installed or certain poorly optimized ones with bugs can also contribute to slower performance.
1. Close applications you aren’t using

It may seem obvious, but it is often overlooked. If your computer is running slow, check all the apps you have open.
Do you really need Mail running in the background? Can you cope with abandoning multitasking by having Calendar, Reminders, and Notes closed when you’re not using them? If so, close them. Once you quit the unneeded apps, it allows your computer to better allocate resources, giving you more RAM (Random Access Memory) to help run the apps you do use much more smoothly.
The easiest way to see which apps are running on your desktop system is to look at the Dock at the bottom of the screen. If a program is running, it will have a dot underneath.
Another option is to press Command + Tab and see which apps are open in the App Switcher.
You can close all unnecessary apps by right-clicking on the Dock icon and choosing Quit, or you can select the app and press Command-Q if you use the App Switcher.
2. Delete apps you don’t need
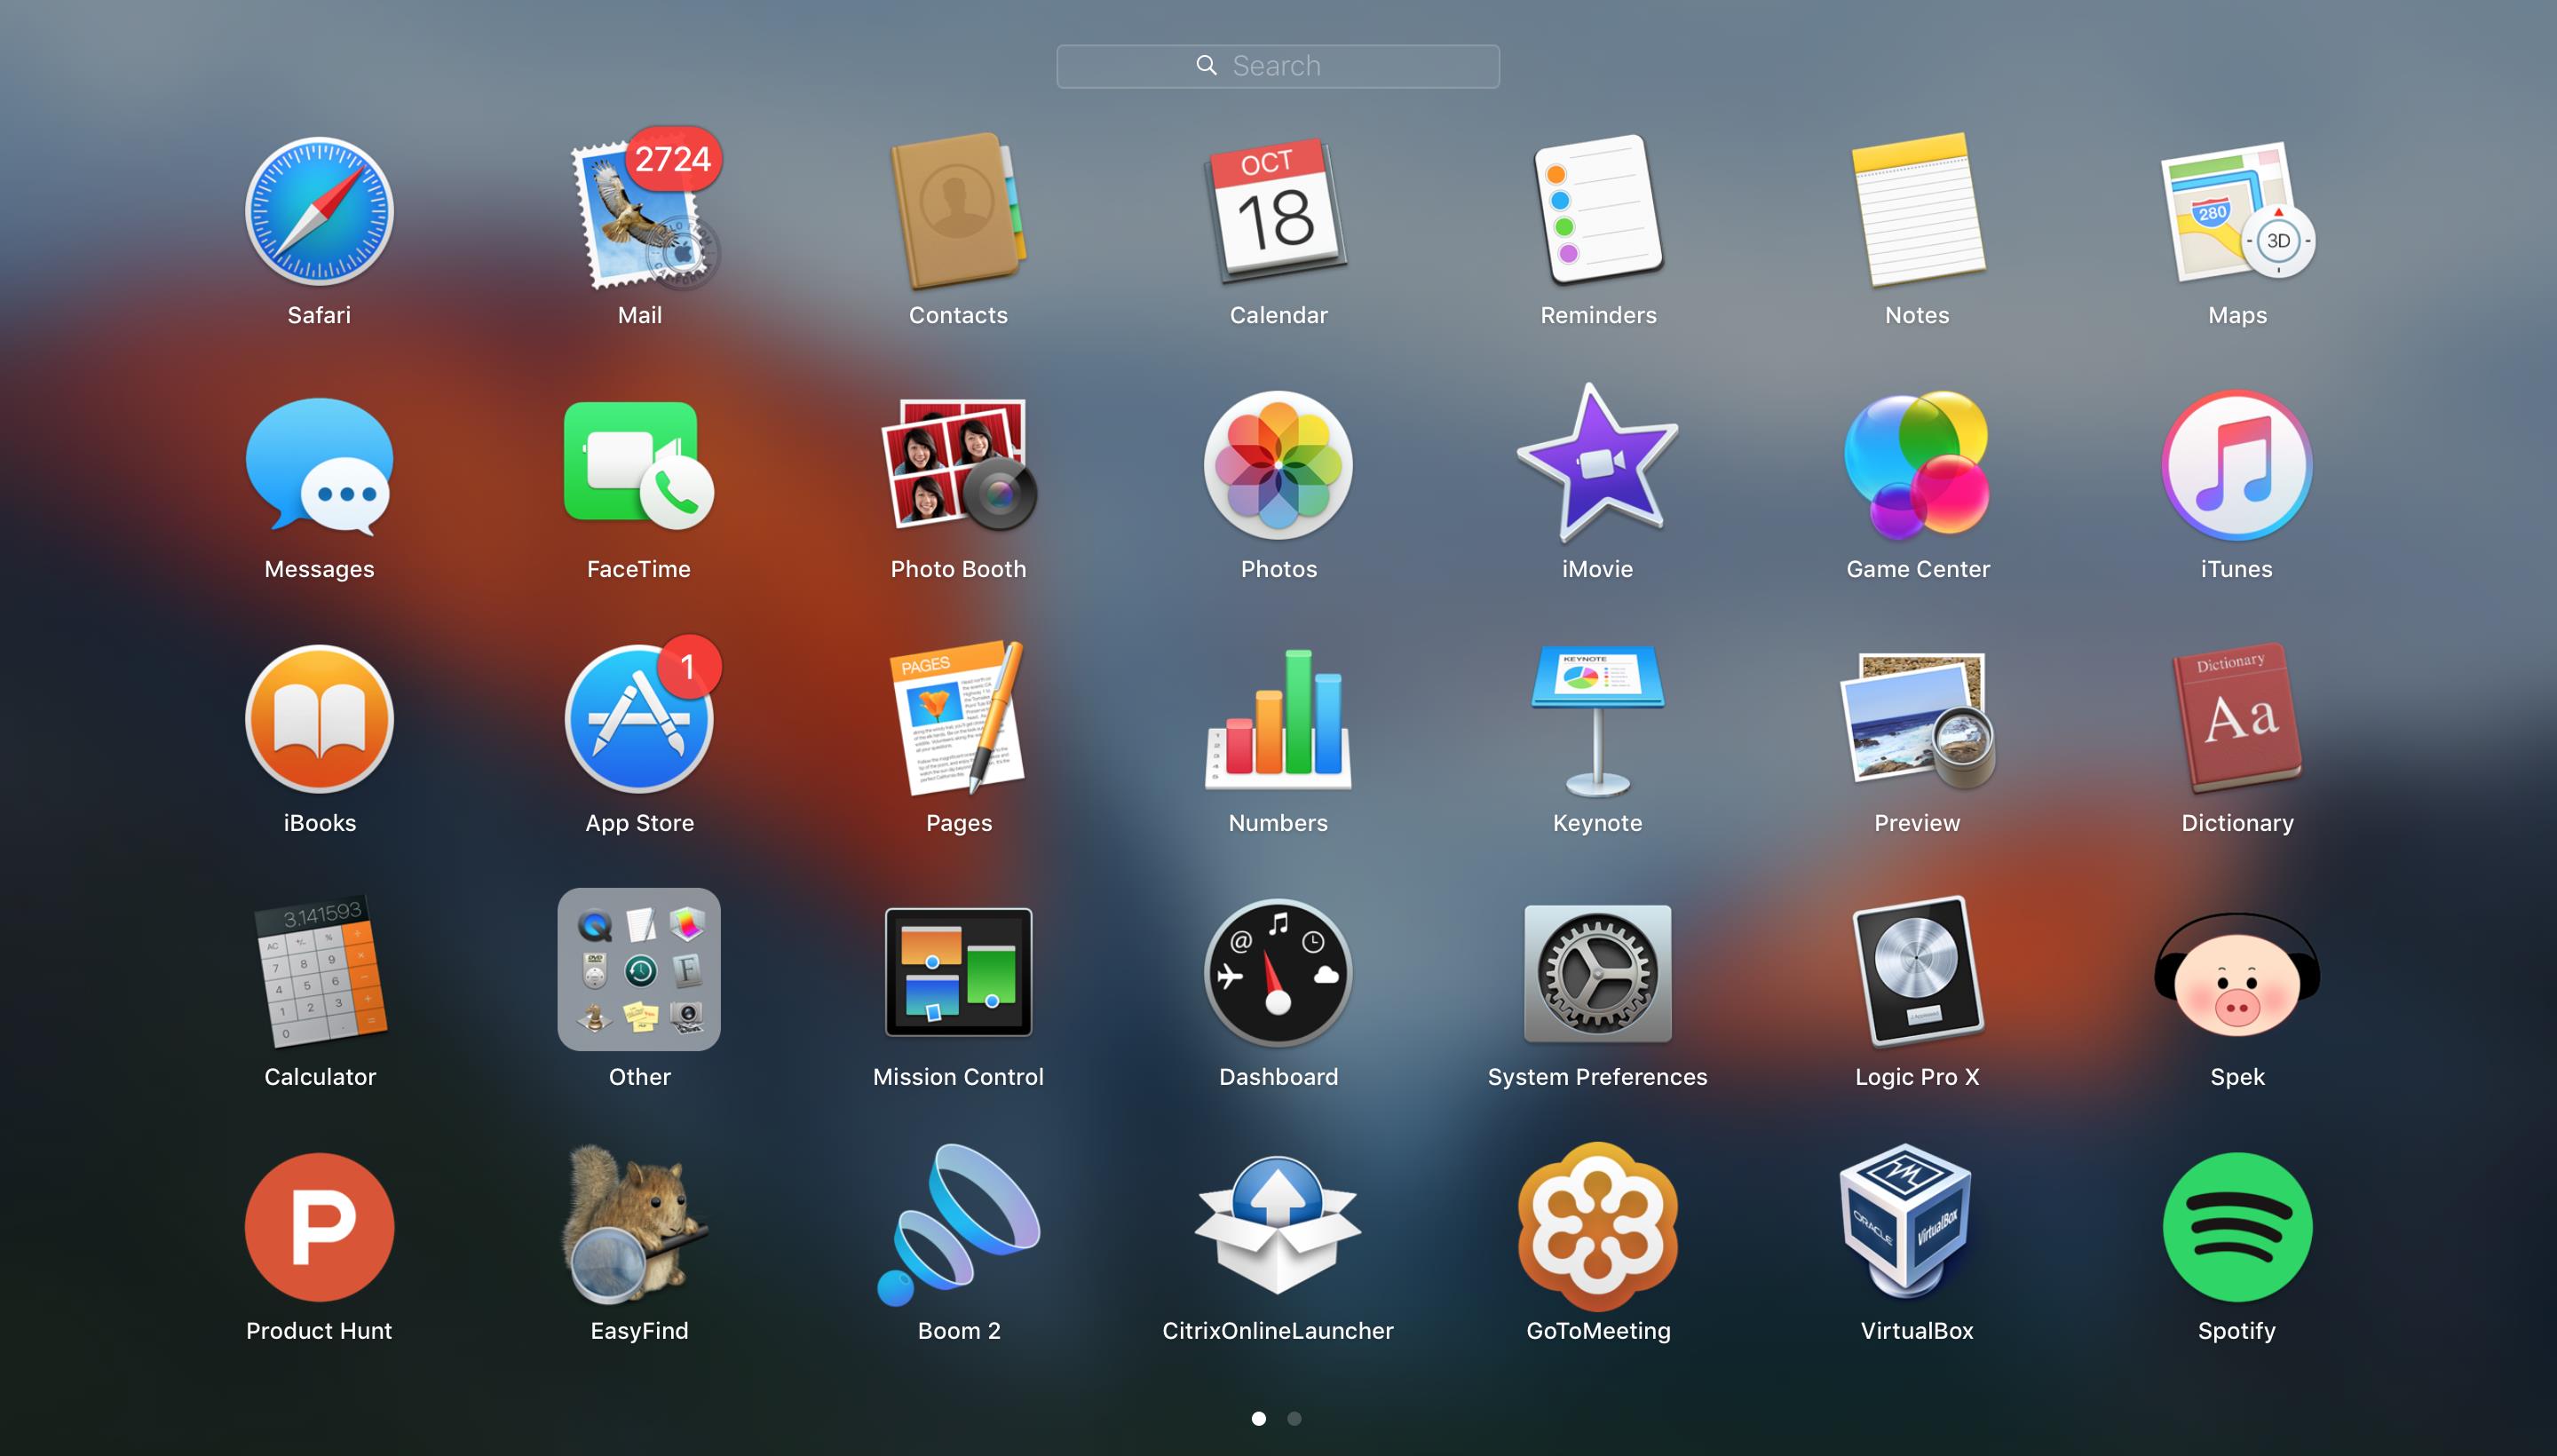
What about deleting the apps you don’t use at all? Think of it as a clear out of your system, just as you would with your bedroom. If you need the software in the future, you can always download it again.
For example, you may find some huge apps you never use, like GarageBand, which could significantly speed up your slow MacBook.
To delete unused apps, follow the next steps:
- Open Finder.
- Go to Applications.
- Select Date Last Opened.
- Delete all applications you haven’t used in weeks, months, or even years.
👉 Learn more: 21 Best Mac Apps
3. Check the activity monitor to know what’s slowing you down
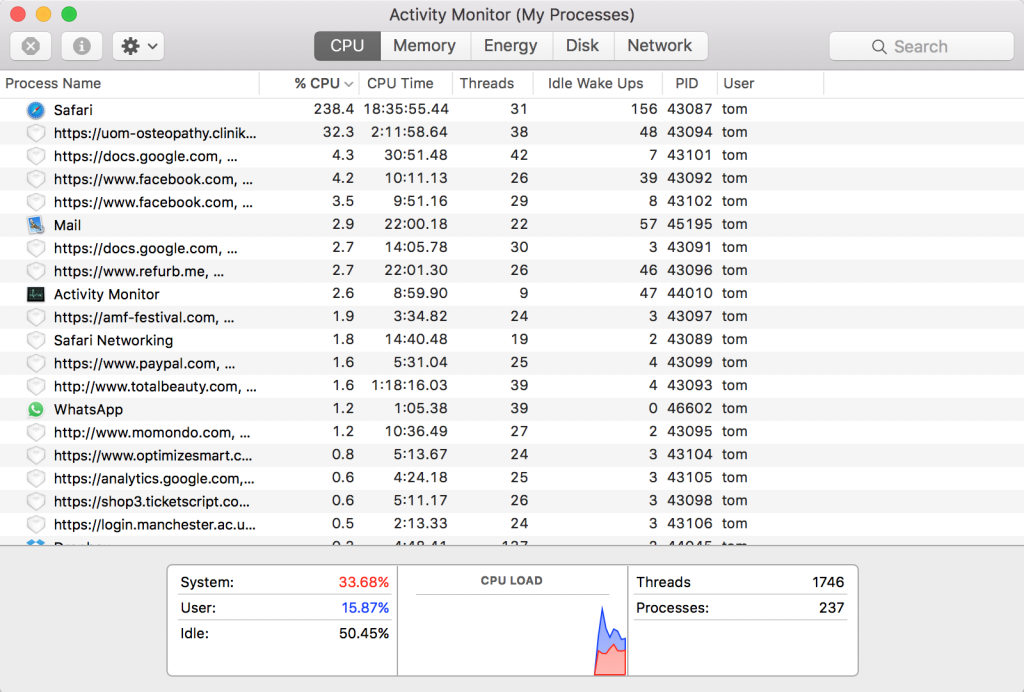
You may not have heard of the Activity Monitor app, but it’s a handy tool in the Application folder. Using the CPU tab—essentially the processor monitor—you can see the usage of each open application and process, and sort the programs by CPU percentage to see this more clearly.
You should look into any apps with high usage and consider why they may be pressuring the CPU. Perhaps you can stop something in the app to prevent it from slowing your computer down (for example, closing down some tabs on Safari).
If there is an exceptionally high CPU process (as opposed to application), you can try killing that with the force quit option at the top left of Activity Monitor.
4. Disable unnecessary startup apps
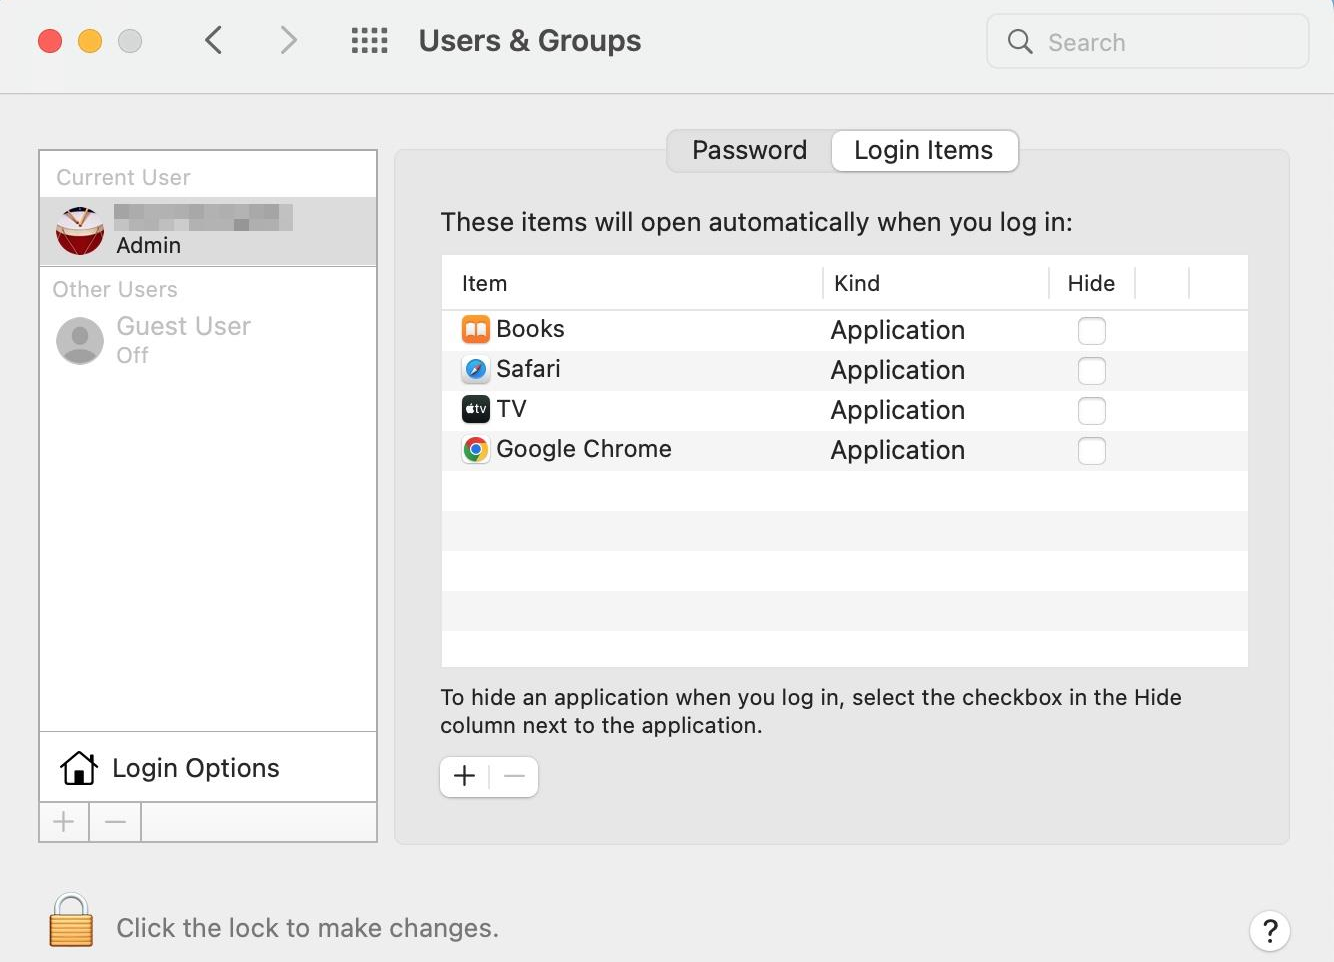
If your Mac is slow right after you boot it up, it could be due to the apps that open at startup.
To fix this, you can disable the Mac startup programs you don’t need. Here’s how you can do it:
- Click the Apple icon in the top-left corner of the screen.
- Choose System Preferences > Users & Groups.
- Click on your username on the left panel if it’s not already selected.
- Navigate to the Login Items tab.
- Look through the list of apps that are set to open automatically when your Mac starts.
- Click the minus (“-“) button beneath the list to remove the selected app(s) from the startup process.
If you encounter any app you don’t even use, think of simply uninstalling it. This will also speed boost your machine.
5. Clear cache from browsers
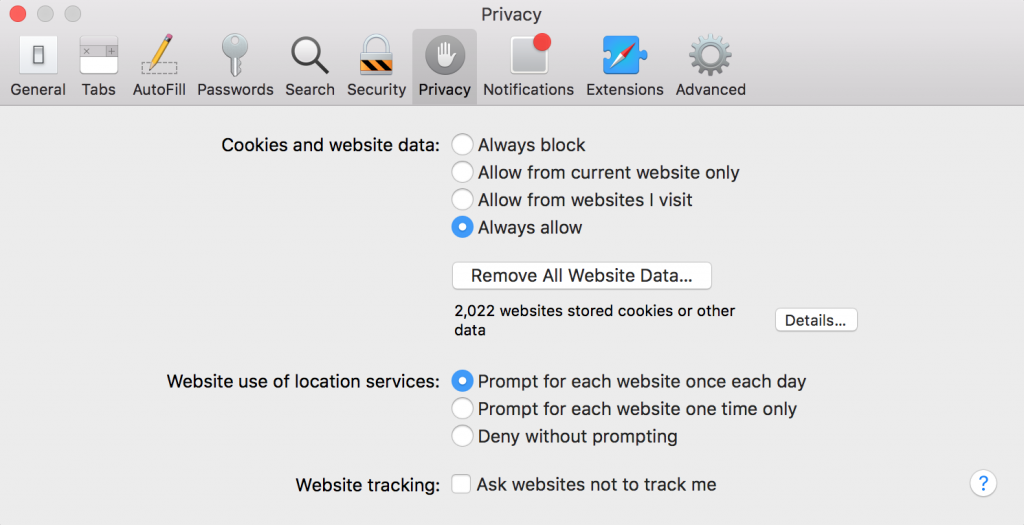
This is a straightforward task. Clean the cache from your browsers, and you will enjoy more free space. More often than not, a smoother-running browser can help speed up your slow MacBook, especially if you use it on a daily basis.
Clearing caches regularly is essential for maintaining your browser’s health. To do so, go to the Privacy section of your browser and remove all website data stored on your computer.
Take into consideration that some of this information may still be valuable to you, such as website preferences, stored login information, or the browser’s history. Select only the data that is unnecessary to you.
6. Optimize disk space usage

You can see what your disk space is being used for by going to the Apple Menu > About This Mac > Storage.
If you’re using more than 90% of your total available storage, you should consider deleting large files or apps you don’t need or use. If you still want to keep these files, we recommend moving them to external storage, such as an external hard disk or USB.
Cloud storage services such as iCloud, Dropbox, and Google Drive are even more convenient. They enable you to access your files whenever you have an internet connection. iCloud is the go-to service for cloud storage if you use a Mac.
7. Install macOS system updates

Software updates keep your applications and computers running to their best potential. We recommend installing all-new updates as soon as possible, especially the updates from Apple. These updates optimize resource usage and can impact your Mac’s speed. Here’s how you can check if your Mac is up-to-date:
- Click the Apple icon in the upper-left corner.
- Go System Preferences.
- Select Software Update.
- macOS will now look for available updates, if any.
- Click the Update Now button if an update is available.
Don’t forget to check the box Automatically keep my Mac up to date so macOS can update the system for you.
8. Delete projects and files within applications

Some large files can be hidden in applications, especially those that involve a lot of media, such as photos, videos, and music. Be sure to open these applications and remove any large and unnecessary files. If an application takes up a lot of disk space, you can likely remove files directly from within the app.
9. Use a RAM monitor or cleaner
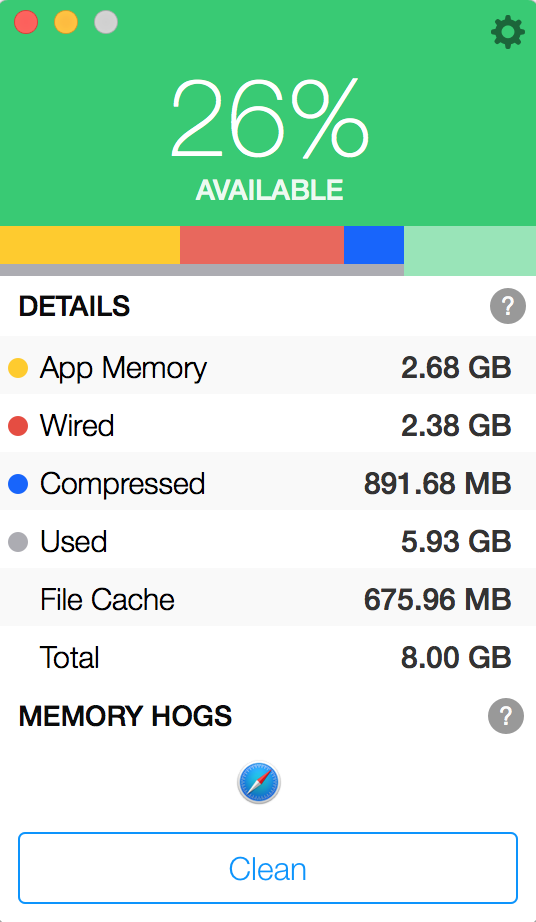
You can find many RAM cleaning tools on the App Store with a quick “memory cleaner” search. Installing one of these apps allows you to see how pressured your RAM is and can then kill all the unnecessary processes taking up some RAM bandwidth—essentially cleaning the memory to free up RAM.
You can also consider cleaning your Mac with third-party tools like CleanMyMac X or CCleaner.
10. Reduce visual effects

Although it’s not a big deal in newer Macs, the macOS visual effects can have an important impact on older MacBooks and iMacs.
You can try to disable visual effects and see if it makes any difference by following these steps:
- Open the Apple menu by clicking on the Apple icon in the upper-left corner of your screen.
- Navigate to System Preferences from the drop-down options.
- Once in System Preferences, click on Accessibility.
- Locate and select Display from the sidebar on the left.
- Check the Reduce motion checkbox to limit motion effects across the macOS.
- Check the Reduce transparency to make your Mac feel snappier.
Also, you can go to Desktop & Dock or Dock, depending on your macOS version, and uncheck Animate opening applications to disable the bouncing animation when apps are launched.
11. Clear system cache

Clearing cache files on your Mac can help free up storage space and improve system performance. Here’s how you can do it:
- Right-click on Finder in the menu bar and select Go to Folder.
- Type in /Library/Caches. This will take you to the system cache folder.
- You can open individual folders and delete the files inside them. Be careful not to delete entire folders, as some system processes rely on them.
- After clearing the cache files, remember to empty the Trash.
12. Manage browser extensions

Browser extensions can add valuable functionality to your browsing experience, but having too many or poorly coded extensions can slow down your Mac significantly. Here’s how to manage browser extensions in common browsers:
Safari
- Open Safari and go to Safari > Preferences > Extensions.
- Review the list of installed extensions.
- To disable an extension, uncheck its checkbox.
- To uninstall an extension, click the Uninstall button.
Chrome
- Open Chrome and go to Chrome > Preferences > Extensions.
- You can also type
chrome://extensions/in the address bar. - Review the list of installed extensions.
- To disable an extension, toggle the switch to the off position.
- To remove an extension, click the Remove button.
Firefox
- Open Firefox and go to Firefox > ‘Add-ons and themes‘ > Extensions.
- You can also type
about:addonsin the address bar. - Review the list of installed extensions.
- To disable an extension, click the three dots next to the extension and select Disable.
- To remove an extension, click the three dots and select Remove.
13. Beware of outdated apps

Just as an outdated macOS can slow down your system, outdated applications can also be a source of performance issues. Older ones might not be optimized for the latest macOS versions or hardware, leading to compatibility problems, sluggishness, or even crashes.
Regularly updating your apps ensures you benefit from bug fixes, performance improvements, and compatibility enhancements. It’s also crucial for security reasons, as outdated apps might have vulnerabilities that malicious software can exploit.
Here’s how to keep your apps updated:
App Store
- Open the App Store and click on the Updates tab.
- Click Update All to update all apps with available updates.
- You can also update individual apps by clicking the Update button next to each app.
Third-party apps
- Many third-party apps have built-in update mechanisms. Check the app’s preferences or settings for an option to check for updates or enable automatic updates.
- If an app doesn’t have a built-in updater, you might need to visit the developer’s website to download the latest version.
14. Check your internet speed

A slow internet connection can often feel like a slow Mac. If web pages are loading slowly, videos are buffering, or online tasks are taking longer than usual, your internet speed might be the culprit.
It’s worth checking your connection speed to rule out internet issues before focusing on troubleshooting your Mac itself. You can use an online tool like Speedtest.
15. Know if your Mac is overheating
Macs are designed to operate within a specific temperature range, and when they get too hot, they can throttle their performance to prevent damage.
Signs of overheating:
- Fans running at high speed: If your Mac’s fans are constantly running at high speed, it’s a clear indication that it’s struggling to stay cool.
- Hot to the touch: The bottom or certain areas of your Mac might feel excessively hot.
- Performance slowdowns: Overheating can cause your Mac to slow down significantly, even for simple tasks.
- Unexpected shutdowns: In extreme cases, your Mac might shut down abruptly to protect itself from damage.
If you suspect your Mac is overheating, check for ventilation, clean the vents, use a cooling pad, use the Monitor activity to determine which processes might be putting excessive strain on your CPU, and reset PRAM, NVRAM, and SMC.
We also recommend watching this video by Tom Scryleus on how to keep your MacBook from overheating:https://www.youtube.com/watch?v=xeCBdNxzdBw
16. Check for malware
While macOS is generally considered to be less susceptible to malware than other operating systems, it’s not entirely immune. Malicious software can still find its way onto your Mac, potentially causing performance issues, stealing sensitive information, or exhibiting other unwanted behavior.
Several reputable antivirus programs, both free and paid, are available for macOS, such as Avast, AVG, and Norton 360. Install one of these programs and run a full system scan to detect any potential malware.
17. Upgrade your RAM or switch to an SSD
If your Mac is feeling sluggish, especially when running multiple applications or handling memory-intensive tasks like video editing or gaming, upgrading your RAM or switching to a solid-state drive (SSD) can provide a significant performance boost.
18. Restart your Mac
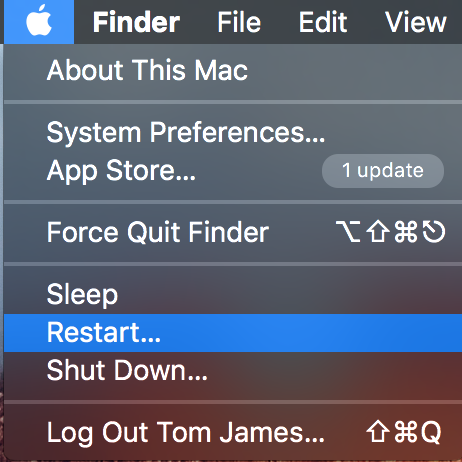
It is simple. If you’re not using your Mac, turn it off. And when you get the chance, restart it to refresh the startup disk. You should see a faster-running MacBook.
19. Maintenance to speed up your slow Mac

Are you still having trouble? You may need expert advice. It should be easy to find a Mac repair specialist who will check out your computer for free.
If they find something wrong, they can recommend the best steps forward. Of course, these may cost a bit, but that may be the only option left if you are at this stage.
20. Your Mac is simply too old
Technology advances rapidly, and even the most well-maintained Macs eventually reach a point where their hardware can no longer keep up with the demands of modern software and operating systems. If you’ve tried all the troubleshooting steps and your Mac is still struggling, it might simply be time for an upgrade.
If a brand-new Mac isn’t within your budget, consider exploring refurbished options.
Final thoughts
We hope these tricks help you speed up your slow MacBook. If you are looking for replacements or want to change and upgrade to a better device, you can check out options on refurbished MacBooks on RefurbMe.
A refurbished MacBook can serve you well in the long run. It is also much lower priced, has a professional warranty, and still offers the same functionality as a brand-new one.
Check out some of our compared refurbished MacBooks on our platform in real time:
Good luck with your endeavor, and may it be a hassle-free experience!
👉 Related article: Mac Won’t Turn On: 10 Easy Ways To Fix It

